Ready to transform your 2nd Gen Xterra's audio from "meh" to "magnificent"? Adding a subwoofer is often the single most impactful upgrade you can make to your ride's sound system, bringing depth, clarity, and that visceral thump you've been missing. And guess what? This isn't some black magic reserved for expert installers. Thanks to the Xterra's inherently DIY-friendly design, installing a subwoofer yourself is not only achievable but genuinely rewarding. This comprehensive 2nd Gen Xterra Subwoofer Installation Guide (DIY) will walk you through every step, ensuring a powerful, clean bass experience without breaking the bank.
At a Glance: Your Subwoofer Installation Journey
- Prep is paramount: Gather all your components and tools, and always disconnect the battery first.
- No factory amp? No problem: Most 2nd Gen Xterras don't have a dedicated factory amp for the main speakers, simplifying your Line Output Converter (LOC) connection.
- Tap into rear speakers: For a signal, connect your LOC to the left and right rear speaker wires.
- Key-on power for remote: Choose a fuse that's only active when your Xterra's key is in the "on" position to prevent battery drain.
- Easy access: The Xterra is known for being straightforward to work on, making wiring runs and panel removal less daunting.
- Secure everything: Loose components are noisy and dangerous. Secure your amp and subwoofer enclosure properly.
- Tune for perfection: Don't skip the final tuning steps to get the best sound quality.
Unlocking Deeper Sound: Why Your Xterra Needs a Subwoofer
Let's be honest, the factory sound system in your 2005-2014 2nd Gen Xterra is, well, factory. It gets the job done for talk radio, but it rarely delivers the full, rich soundscape your music deserves. The biggest missing piece? Low-frequency response – the bass. Without a dedicated subwoofer, your small door speakers struggle to produce deep, resonant bass, often leading to muddy mids and highs as they try to compensate.
A well-integrated subwoofer doesn't just add more "boom"; it frees up your main speakers to focus on the frequencies they're designed for, resulting in a clearer, more dynamic, and immersive listening experience across the board. Plus, with the Xterra's robust interior and cargo space, there's ample room for even substantial bass setups, making it a prime candidate for an audio upgrade. The relative ease of access to wiring and interior panels makes the DIY aspect even more appealing.
Laying the Foundation: Understanding Your Xterra's Audio System
Before you start tearing things apart, it helps to understand how your Xterra's audio system works, especially regarding the crucial link to your new subwoofer setup.
Most 2nd Gen Xterras (from 2005-2014) came with a basic factory head unit (the radio) and no separate factory amplifier for the main speakers. This is actually good news for a subwoofer installation! It means you won't have to contend with complex factory amplified signals that require special interfaces.
The Mighty Line Output Converter (LOC)
Since you're likely retaining your factory head unit, you'll need a way to get a clean audio signal for your new amplifier. This is where the Line Output Converter (LOC) comes in. Your factory head unit outputs "speaker level" signals – amplified signals meant for your speakers. Your new amplifier, however, needs "line level" signals (like what RCA cables carry).
The LOC simply takes those speaker-level signals, reduces their voltage, and converts them into clean, low-level RCA outputs that your amplifier can use. Think of it as a translator between your factory radio and your aftermarket amp. You'll typically tap the LOC into the wiring of your rear speakers because these wires are easily accessible and provide a full-range signal that's perfect for a subwoofer.
Gathering Your Gear: Essential Components for Your Bass Build
A successful DIY installation starts with having the right tools and, more importantly, the right components. Don't skimp here; quality components ensure better sound and longevity.
The Core Components:
- Subwoofer:
- Size: Common sizes range from 8 inches to 15 inches. 10-inch and 12-inch subs are popular choices for Xterras, offering a good balance of impact and enclosure size.
- Enclosure: Crucial for sound quality. You can buy pre-made sealed or ported enclosures designed for specific subwoofers, or even build a custom box for a perfect fit in your Xterra's cargo area.
- Impedance: Typically 2-ohm or 4-ohm. Match this to your amplifier's capabilities.
- Amplifier:
- Type: You'll want a monoblock (single channel) amplifier specifically designed for subwoofers.
- Power (RMS): This is the continuous power your amp delivers. Match the amplifier's RMS output to your subwoofer's RMS power handling for optimal performance and to prevent damage.
- Line Output Converter (LOC): As discussed, this converts speaker-level signals to line-level RCA signals. Some higher-end amplifiers have built-in LOCs, but a standalone unit often offers better adjustability.
- Amplifier Wiring Kit: This all-in-one kit usually includes:
- Power Wire: Heavy gauge (4-gauge or 8-gauge, depending on amp power) to run from your battery to the amp.
- Ground Wire: Same gauge as the power wire, for a short connection from the amp to your Xterra's chassis.
- Remote Turn-On Wire: Thin wire (16-18 gauge) to tell your amp when to turn on and off with your key.
- RCA Cables: To carry the audio signal from the LOC to the amp.
- Speaker Wire: To connect your amp to the subwoofer(s).
- Inline Fuse Holder & Fuse: A critical safety component placed near the battery on the power wire.
Tools You'll Definitely Need:
- Wire Strippers & Crimpers: For making clean electrical connections.
- Multimeter: Essential for identifying speaker wires, testing for "key-on" power, and troubleshooting.
- Socket Set & Wrenches: For battery terminals, ground points, and securing components.
- Panel Removal Tools (Plastic Trim Tools): Protect your interior panels when prying them off. You might find a general guide like the Front Door panel removal helpful for understanding how Xterra interior panels are typically secured.
- Drill & Drill Bits: For mounting components and potentially routing wires.
- Zip Ties & Electrical Tape: For securing wires and insulation.
- Heat Shrink Tubing (Optional but Recommended): For robust, insulated connections.
- Wire Coat Hanger or Fish Tape: For routing wires through tight spaces like the firewall.
- Safety Glasses & Gloves.
Recommended Add-ons for a Pro-Level Install:
- Fuse Tap: A clever device that plugs into an existing fuse slot to safely provide a source for your remote turn-on wire without cutting into factory wiring.
- Sound Deadening Material: Applying sound deadening to the cargo area and rear hatch will significantly improve bass response by reducing rattles and preventing sound from escaping. This complements efforts to reduce interior wind and road noise FREE for a quieter cabin overall.
- Distribution Block (for multiple accessories): If you plan on adding more electrical accessories later, installing a Fuse Block Installation now for organized power distribution is a smart move.
Pre-Installation Checklist: Getting Ready to Rumble
Before you make that first cut or pull that first panel, take a moment to prepare. This prevents frustration and ensures safety.
- Read All Manuals: Familiarize yourself with your subwoofer, amplifier, and LOC instructions.
- Plan Your Layout: Decide where the amplifier and subwoofer enclosure will be mounted. In an Xterra, common amp locations include under the rear seats (if space allows), mounted to the back of the rear seats, or on the side of the cargo area.
- Disconnect the Battery: CRITICAL SAFETY STEP. Disconnect the negative (-) terminal first. This prevents accidental shorts and potential damage to your vehicle's electrical system or yourself.
- Gather Your Tools: Have everything within reach.
- Test Components (Optional): If you have a bench power supply, a quick test of your amp and subwoofer can confirm they're working before installation.
Step-by-Step Installation: Bringing the Bass to Life
This is where the magic happens. We'll break down the installation into manageable steps.
Step 1: Gaining Access & Running the Power Wire
The Xterra is known for its relatively "simple installation due to easy access," which is a huge bonus here.
- Clear the Path: Remove floor mats, cargo organizers, and anything else obstructing your work area.
- Find a Firewall Grommet: Locate a rubber grommet in the firewall (the metal wall separating the engine bay from the cabin) where you can safely pass the power wire. Many Xterras have unused grommets or ones that can be carefully punctured or shared with existing wiring bundles. Look near the brake booster or behind the glove box.
- Route the Power Wire:
- From the engine bay side, carefully push a wire coat hanger or fish tape through the grommet into the cabin.
- Securely tape your power wire to the hanger and pull it through.
- Run the power wire along the driver's side of the vehicle, under the carpet and trim panels (kick panel, door sill plates), towards your amplifier's mounting location. Keep it away from other wiring harnesses, especially audio cables, to minimize noise.
- Install the Inline Fuse Holder: This is a crucial safety component. Cut the power wire about 12-18 inches from the battery, install the fuse holder, and make sure the fuse is NOT inserted yet. We'll connect it to the battery later.
Step 2: Mounting the Amplifier
Choosing the right spot ensures optimal performance and longevity.
- Select a Location:
- Under Rear Seat: Popular if your amp is compact, keeps it hidden.
- Cargo Area Side Panel: Can be mounted to an existing panel or a custom-built amp rack.
- Back of Rear Seat: If you don't use the full cargo capacity often.
- Crucial: Ensure the location has good ventilation. Amplifiers generate heat, and overheating can lead to damage and shutdown.
- Secure the Amplifier: Use self-tapping screws (into metal or reinforced plastic) or bolts and nuts if drilling through structural elements. Ensure it's mounted firmly; you don't want it bouncing around while off-roading or during sudden stops.
Step 3: Wiring the Power & Ground
Clean power is the backbone of good bass.
- Connect to the Battery: Once the power wire is routed, connect it to the positive (+) terminal of your battery, after the inline fuse holder. Remember, the fuse should still be out.
- Connect the Ground Wire:
- Find a clean, unpainted, sturdy metal surface on your Xterra's chassis, very close to your amplifier. The shorter the ground wire, the better.
- Scrape away any paint to ensure a bare metal connection.
- Drill a small pilot hole, then use a self-tapping screw or bolt with a star washer to secure the ground wire's ring terminal firmly. A poor ground connection is a common cause of system noise.
- Connect the other end of the ground wire to your amplifier's ground terminal.
Step 4: Connecting the Line Output Converter (LOC)
This is where your Xterra's factory audio signal gets translated.
- Access Rear Speaker Wires: You'll need to locate the wiring for your rear speakers. This typically involves removing the kick panels, rear door sills, or even a rear cargo panel, depending on where the speaker wires are most accessible. You can often find these wires in the wire loom running along the floor under the trim.
- Identify Speaker Wires: Use your multimeter. Set it to measure DC voltage, turn on your radio, and play some music. Probe different wires. When you find a pair that shows a fluctuating AC voltage corresponding to the music, you've found a speaker wire pair. Alternatively, consult an Xterra-specific wiring diagram (forums are excellent for this).
- Crucial Ground Truth: You need to tap into both the right and left rear speakers. This provides a full stereo signal to the LOC, which then sums it to a mono signal ideal for a subwoofer.
- Tap the Wires: Use T-taps or carefully strip a small section of insulation from the factory speaker wires (don't cut them completely!) and solder or crimp the LOC's input wires to them. Ensure a secure, insulated connection.
- Mount the LOC: Find a convenient spot near your amplifier, or tucked away behind a panel.
Step 5: Running the Remote Turn-On Wire
This thin wire tells your amplifier when to wake up.
- Find a Switched 12V Source: Crucial Ground Truth: You must find a 12-volt fuse that only activates when the key is turned to the "on" position. Failure to do so will keep your amplifier constantly powered, draining your battery!
- Open your Xterra's fuse box (usually under the dash or to the side of the dash).
- Use your multimeter to find a fuse slot that has 12V only when the key is "on" and 0V when the key is "off." Common choices are fuses for the accessory power outlets, radio, or other non-essential circuits.
- Use a Fuse Tap: A fuse tap (add-on recommendation) is the cleanest way to do this. Simply pull the existing fuse, insert it into the fuse tap, then insert another small fuse for your remote wire into the tap, and plug the whole assembly into the fuse box. Connect your remote wire to the fuse tap's pigtail.
- Route the Wire: Run this thin wire alongside your RCA cables (on the opposite side of the car from your power wire, if possible) to your amplifier's "REM" or "Remote" terminal.
Note: For a detailed guide on handling various electrical modifications, you might find the process for something like 2nd Gen hitch wiring (Nissan factory harness w aftermarket plug) or even an Inverter Install with Tech package helpful for general understanding of vehicle electrical routing and connections.
Step 6: Running RCA Cables (LOC to Amp)
These carry the clean audio signal.
- Connect LOC to Amp: Connect one end of your RCA cables to the output of your LOC and the other end to the input of your amplifier.
- Route Carefully: Route the RCA cables away from the power wire. Running them down the center of the vehicle, or along the passenger side (if power is on the driver's side), helps prevent alternator whine and other noise interference.
Step 7: Wiring the Subwoofer to the Amplifier
Almost there!
- Connect Speaker Wire: Run the speaker wire from your amplifier's speaker output terminals to the input terminals on your subwoofer enclosure.
- Match Impedance: Double-check that your wiring configuration (e.g., parallel or series for multiple subwoofers) results in an impedance that your amplifier is stable with. Most monoblock amps are stable at 2-ohms or 1-ohm.
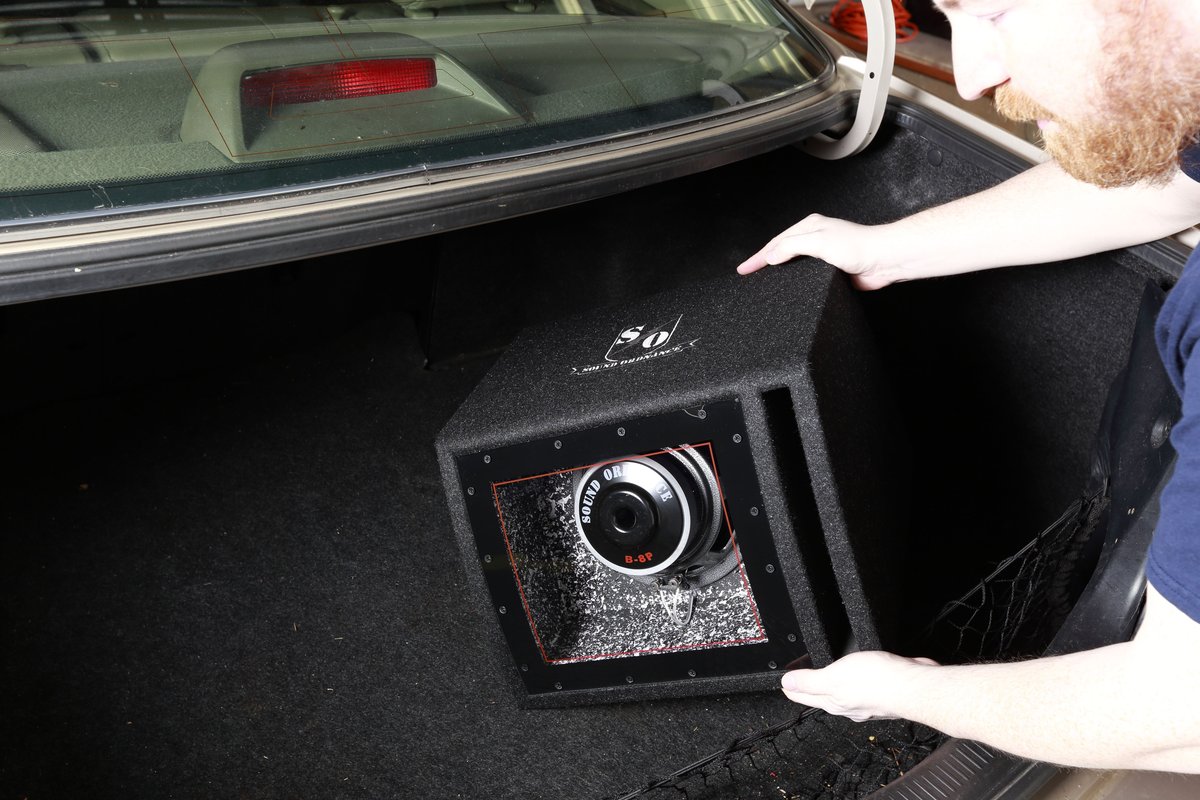
Step 8: Mounting the Subwoofer Enclosure
Secure your bass machine!
- Position and Secure: Place your subwoofer enclosure in its desired location in the cargo area.
- Prevent Movement: Subwoofers can be heavy and become projectiles in an accident. Use straps, L-brackets, or custom mounts to securely fasten the enclosure to the Xterra's floor or cargo tie-downs.
Initial Power-Up & Tuning: Fine-Tuning Your Sound
With everything wired, it's time for the moment of truth.
- Double-Check All Connections: Ensure everything is tight, insulated, and correctly wired.
- Insert Fuse: Install the fuse into your inline fuse holder near the battery.
- Reconnect Battery: Reconnect the negative (-) battery terminal.
- Test the Remote Turn-On: Turn your Xterra's key to the "on" position (or start the engine). Your amplifier should power on (indicated by an LED). Turn the key off; the amp should power down. If it stays on, review your remote wire connection.
- Initial Amplifier Settings (Gain, Crossover, Bass Boost):
- Gain: This is NOT a volume knob. It matches the output voltage of your LOC to the input sensitivity of your amplifier. Start with the gain knob at its minimum (all the way down). Slowly turn up your radio volume to about 75-80% of max. Then, slowly turn up the amplifier's gain until the bass sounds full and clean, without distortion. If you hear distortion, back off the gain.
- Low-Pass Filter (LPF) / Crossover: This filters out high frequencies, ensuring only bass goes to your subwoofer. Start around 80-100 Hz. Adjust to blend smoothly with your main speakers.
- Bass Boost: Use sparingly, if at all. Too much bass boost can introduce distortion and damage your subwoofer.
- Listen and Adjust: Play a variety of music. Sit in your normal driving position and listen. Adjust the gain, LPF, and phase switch (if your amp has one) until the bass sounds natural, impactful, and blends seamlessly with your Xterra's front speakers.
Troubleshooting Common Issues
Even the best DIYers encounter a snag or two. Here's a quick guide to common problems.
- No Power to Amplifier:
- Check the fuse in the inline fuse holder near the battery.
- Verify battery connections (positive and ground).
- Check the remote turn-on wire connection and its fuse. Is it a true "key-on" source?
- Ensure the amplifier's ground connection is solid and on bare metal.
- Amplifier On, No Sound from Subwoofer:
- Check RCA cables: Are they securely plugged into the LOC and amplifier?
- Check LOC connections: Are they securely tapped into the correct rear speaker wires?
- Check subwoofer speaker wire connections: Are they tight at both the amp and sub?
- Review amplifier settings: Is the gain turned up? Is the LPF set appropriately? Is the amp in "protect" mode?
- Engine Whine or Hissing Noise:
- Most commonly a ground loop issue. Ensure your amplifier's ground is short, clean, and solid.
- Check power and RCA cable routing. They should ideally be on opposite sides of the vehicle.
- Sometimes a ground loop isolator on the RCA cables can help, but addressing the root cause is better.
- Bass is Weak or Overpowering:
- Adjust amplifier gain and LPF settings.
- Check subwoofer phase switch (0 or 180 degrees). Experiment to see which sounds fuller.
- Consider your enclosure. Is it the right size and type for your subwoofer?
Maintenance & Enjoyment: Keeping the Beats Alive
Once your subwoofer is installed and tuned, a few simple practices will ensure long-term enjoyment.
- Periodic Checks: Every few months, give your wiring connections a quick check. Ensure all terminals are tight, especially power and ground.
- Cleanliness: Keep your amplifier free of dust and debris to ensure proper cooling.
- Sound Deadening: If you didn't do it during installation, consider adding sound deadening to your cargo area, rear hatch, and even the rear doors. This isn't just about reducing rattles; it significantly improves the overall acoustics, making your bass tighter and more impactful by preventing sound waves from escaping or being absorbed by flimsy panels. Remember, a quieter cabin, achieved through measures like reducing interior wind and road noise FREE, enhances every aspect of your audio experience.
Beyond the Subwoofer: Next-Level Xterra Audio Upgrades
While a subwoofer is a huge step, it's just one piece of the audio puzzle. If you're bitten by the audio bug, here are other ways to enhance your 2nd Gen Xterra's sound:
- Speaker Upgrades: Replacing your factory door speakers with higher-quality component or coaxial speakers will drastically improve clarity and detail.
- Head Unit Replacement: An aftermarket head unit offers better sound processing, more tuning options, and modern features like Apple CarPlay/Android Auto.
- Dedicated 4-Channel Amplifier: Powering your main speakers with an aftermarket amplifier will bring out even more detail and dynamic range that your factory head unit simply can't provide.
Your Xterra, Your Sound: A DIY Victory
You've done it! You've taken the plunge, followed this 2nd Gen Xterra Subwoofer Installation Guide (DIY), and now your trusty Nissan Xterra is pumping out bass that truly transforms your driving experience. There's immense satisfaction in a DIY project, especially one that so directly enhances your daily enjoyment.
Remember, the goal isn't just to make noise, but to create a balanced, clear, and immersive soundstage. With your new subwoofer, your Xterra is no longer just a rugged off-roader; it's a mobile concert hall on wheels. Dive deeper into optimizing your Xterra's sound system and other upgrades by exploring our comprehensive resource on Subwoofer for 2nd Gen Xterra options and beyond. Enjoy the ride, and crank up that bass!