Your Xterra is built for adventure, but let's be honest, its factory audio system often leaves a bit to be desired, especially when it comes to the low-end rumble that brings music to life. Imagine feeling every beat and bassline, transforming your ride into a concert hall on wheels. This isn't a pipe dream; integrating subwoofers with Xterra factory audio systems is a completely achievable upgrade that dramatically enhances your driving soundtrack. With the right approach, you can inject deep, powerful bass into your SUV without overhauling your entire setup.
This guide is your roadmap to achieving that immersive sound, tackling the process step-by-step, from selecting the right gear to fine-tuning for perfection. We’ll cover everything you need to know to make your Xterra’s audio system sound as robust as the vehicle itself.
At a Glance: Your Xterra Bass Upgrade Roadmap
- Bass Boost: Adding a subwoofer fundamentally enhances your music, creating a more dynamic and engaging listening experience.
- Amplification is Key: Most subwoofers require a dedicated amplifier for sufficient power and sound quality. Powered subs have an amp built-in.
- Line-Output Converter (LOC): If your factory stereo lacks RCA outputs (pre-amp outs), an LOC is essential to convert speaker-level signals for your amplifier.
- Safety First: Always disconnect your battery's negative terminal before starting any electrical work.
- Strategic Wiring: Route power and signal wires on opposite sides of your vehicle to prevent annoying interference and hum.
- Tune for Perfection: Proper gain and crossover settings on your amplifier are crucial for tight, blended bass, not just loud thumps.
Why Your Xterra Needs More Bass (Beyond Just "Loud")
Factory audio systems in vehicles like the Nissan Xterra are typically designed for general listening, prioritizing vocal clarity and mid-range frequencies. While they get the job done, they often struggle to reproduce deep bass notes with any real impact or fidelity. This leaves your music sounding thin, lacking depth, and failing to deliver that "punch" that makes songs truly come alive.
Adding a subwoofer isn't just about making your system louder; it's about balance and immersion. A properly integrated subwoofer offloads the low-frequency duties from your smaller factory speakers, allowing them to perform better in their intended frequency range. The result? Cleaner highs, clearer mids, and a rich, foundational bass that makes your music feel more complete, immersive, and enjoyable on every journey, from daily commutes to off-road adventures.
Gathering Your Gear: The Right Tools for the Job
Before you begin, ensure you have all the necessary components. Skimping on quality here can lead to frustrating issues down the road.
- Subwoofer & Amplifier: Unless you opt for a powered subwoofer (which has an amplifier built-in), you'll need both a separate subwoofer driver and a matching amplifier. Ensure the amp's RMS output closely matches the sub's RMS power handling at the correct impedance (2Ω or 4Ω). A good amp will feature gain control and a low-pass filter.
- Line-Output Converter (LOC): This is non-negotiable if your Xterra's factory head unit lacks "pre-amp out," "line-level out," or "sub-out" connections (which most do). An LOC converts the high-level speaker signals from your stereo into low-level RCA signals that your amplifier can use. Always opt for a high-quality LOC for superior sound clarity over basic hi-low converters.
- Wiring Kit Essentials:
- Power Wire: Typically 4-gauge for systems up to 500W RMS. This runs from your battery to the amplifier.
- Ground Wire: A short (18-24 inches max), heavy-gauge wire, ideally the same gauge as your power wire, for a secure connection to the chassis.
- Inline Fuse & Holder: Absolutely critical for safety. This fuse, rated at least 50 amps (or 1.25 times your amp's max current draw), must be placed within 18 inches of your battery's positive terminal. Standard 30A or 40A fuses are common for typical amplifiers.
- RCA Cables: To carry the audio signal from your stereo (or LOC) to your amplifier.
- Remote Turn-On Wire: Usually a thin blue wire, this tells your amplifier when to turn on and off with your stereo.
- Speaker Wires: To connect your amplifier to the subwoofer.
- Basic Tool Kit: You'll need screwdrivers (Phillips and flathead), pliers, a wire stripper/crimper, a utility knife, electrical tape, a multimeter (for checking connections and voltage), a metric socket set (for battery terminals and mounting bolts), and protective gloves.
- Subwoofer Enclosure (Box): Depending on your subwoofer type (component sub vs. pre-boxed sub), you might need to purchase or build an enclosure. Matching the box volume and type (sealed or ported) to your subwoofer is crucial for optimal performance.
Laying the Groundwork: Critical Pre-Installation & Safety Checks
Before you start tearing into your Xterra, a bit of planning and adherence to safety protocols will save you headaches—and potential electrical damage.
- Safety First: Disconnect the Battery: This is the golden rule for any automotive electrical work. Always disconnect the negative terminal cable from your car battery first. Tuck it away or tape it so it can't accidentally touch other metal components. This prevents short circuits and protects you.
- Scout for Power and Ground: Your subwoofer amplifier needs a dedicated 12V power source (from the battery) and a robust ground connection. Locate a suitable, unpainted metal ground point near where you plan to mount the amplifier – a seatbelt bolt or a chassis bolt often works well. You'll need to sand off any paint to ensure bare metal contact.
- Stereo Compatibility Check (The LOC Imperative): This is where most factory systems hit a snag. Check the back of your Xterra's head unit for "pre-amp out," "line-level out," or "sub-out" connections. If these are absent (which is highly likely), a Line-Output Converter (LOC) is absolutely necessary. It will tap into your speaker wires to grab the audio signal.
- Amplifier and Subwoofer Matchmaking:
- Power: Ensure your amplifier's RMS output rating is within 10% of your subwoofer's RMS power handling. A 500W RMS sub typically pairs well with a 450-550W RMS amplifier.
- Impedance: Verify the amplifier's stable impedance matches your subwoofer's impedance (e.g., a 2Ω stable amp for a 2Ω sub).
- Features: Your amp should include gain control for volume matching and a low-pass filter to ensure only bass frequencies go to the sub.
- Strategic Wire Routing: To prevent annoying noise (like engine whine or alternator hum), route your main power wire (from the battery) on one side of the Xterra, and your signal wires (RCAs, remote turn-on) on the opposite side. This minimizes electromagnetic interference. Think driver's side for power, passenger's side for signal, or vice-versa.
For those specifically looking at enhancing the sound in their second-generation Xterra, you might find more detailed subwoofer enclosure specifics and placement tips in our Xterra 2nd gen subwoofer guide.
Step-by-Step: Integrating Your Subwoofer into the Xterra
With your gear ready and your safety checks complete, it’s time to get hands-on.
1. Finding the Perfect Spot for Your Bass
The placement of your subwoofer and amplifier isn't just about fitting it in; it affects sound quality and cargo space.
- Subwoofer Placement:
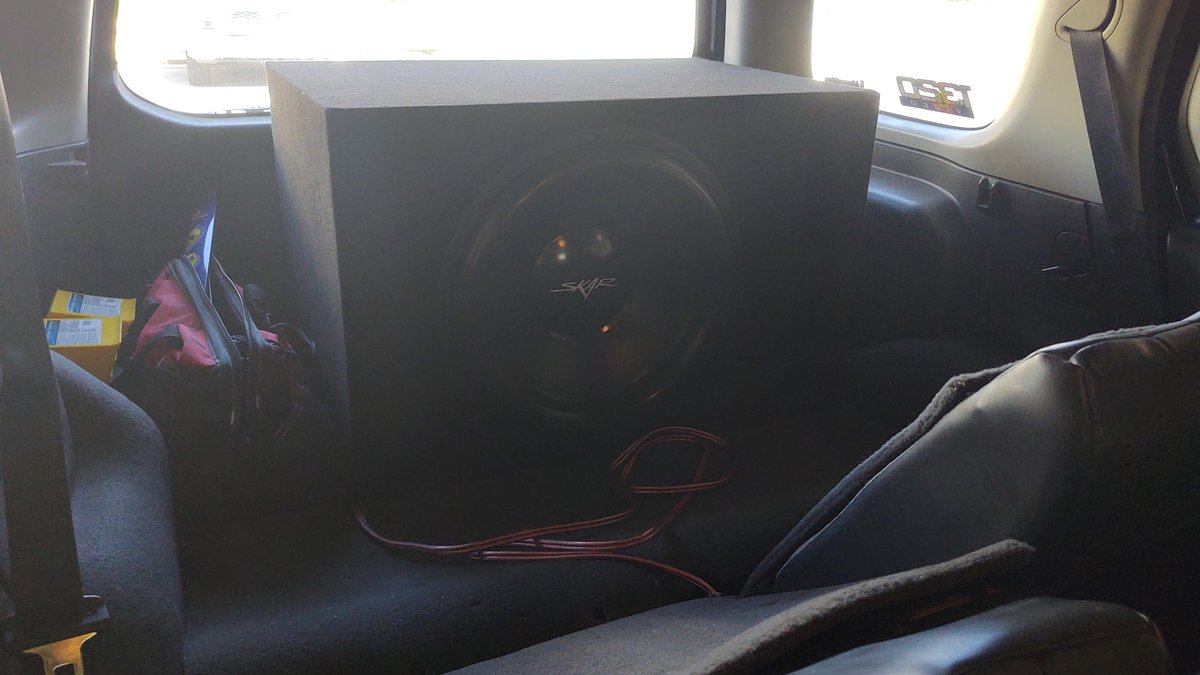
- Cargo Area Corner: This is the most common spot for component subwoofers in an enclosure. It offers maximum output and easy access for tuning, though it will consume some cargo space.
- Under-Seat: For compact powered subwoofers, under a front seat can provide a hidden installation and surprisingly tight bass, but ensure there's enough clearance for airflow to prevent overheating.
- Custom/Factory-Fit Slots: Some Xterra owners create custom enclosures that fit seamlessly into side panels or under the rear bench. This offers a factory look but requires more fabrication.
- Amplifier Placement: Find a location that offers good ventilation, protection from moisture, and easy access for wiring and adjustments. Common spots include:
- Mounted to the back of the subwoofer enclosure.
- Under a seat (if it's a smaller amp).
- Mounted to the rear seat back.
- Secure your amp and sub using screws, bolts, or heavy-duty Velcro. Consider rubber isolation pads under the enclosure to minimize rattles.
2. Wiring Up the Juice: Power to the Amp
This is arguably the most critical and potentially dangerous step if done incorrectly.
- Run the Power Wire: Start by running the heavy-gauge power wire (e.g., 4-gauge) from your chosen amplifier location forward towards the engine bay. Look for an existing rubber grommet in the firewall (often behind the glovebox or near the steering column) to pass the wire through. If no suitable grommet exists, you may need to drill a new hole, but be extremely careful not to drill into existing wiring or fuel lines, and protect the wire with a grommet.
- Inline Fuse Installation: Once the wire is through the firewall, cut it to length to reach your battery's positive terminal. Crucially, install the inline fuse holder within 18 inches of the battery's positive post. Do not insert the fuse into the holder yet. Connect the wire from the battery to one side of the fuse holder, and the wire going to the amp to the other side.
- Hiding the Wire: Carefully tuck the power wire under the carpet, plastic trim panels, or along the factory wiring harnesses, keeping it away from sharp edges and moving parts.
3. Signal & Switch: RCA and Remote Wires
These wires carry the audio signal and tell your amp when to turn on. Remember our rule: opposite sides from the power wire!
- Route Signal Wires: Run the RCA cables and the thin remote turn-on wire from the amplifier location to the factory stereo's location. Typically, you'll route these under the door sills, side panels, or carpet on the opposite side of the vehicle from your power wire.
- Protect & Secure: Use zip ties to bundle and secure these wires, ensuring they don't get pinched or interfere with moving parts.
4. Accessing Your Factory Stereo
This step requires a delicate touch to avoid damaging your dashboard trim.
- Trim Removal: Using a plastic pry tool (highly recommended over a metal screwdriver to prevent scratches), carefully pry off any surrounding dashboard trim panels to expose the stereo mounting screws. Many Xterra models use clips that will pop off.
- Unscrew & Pull: Once the trim is off, unscrew the mounting bolts or screws holding the factory stereo in place. Gently pull the stereo forward to access the rear connections. You don't need to completely remove it, just pull it out far enough to work behind it.
5. Making the Connections to the Stereo
This is where the LOC comes into play for most Xterra owners.
- RCA Connections (If Available): If, by some miracle, your Xterra stereo has "pre-amp out" or "sub-out" RCA jacks, simply connect your RCA cables directly to them, matching red to red and white to white.
- Line-Output Converter (LOC) Connection: This is the more common scenario.
- Tap Speaker Wires: You'll need to tap into the rear speaker wires coming out of your factory stereo harness. Use T-taps or solder connections to securely connect the LOC's input wires to the corresponding positive (+) and negative (-) wires of both your left and right rear speakers. The LOC typically comes with wiring diagrams.
- RCA Out from LOC: Once the speaker wires are connected to the LOC, plug your RCA cables into the LOC's output jacks.
- Remote Turn-On Wire: Connect the remote turn-on wire (usually blue) from your amplifier to a reliable ignition-switched 12V source behind the stereo. This is often labeled "REM" on aftermarket harnesses, or you can find a switched power source using your multimeter. This ensures your amp only turns on when the car is running.
- Zero Out the Bass: Before replacing the stereo, set the head unit's bass level or subwoofer output level (if it has one) to its lowest or "flat" setting. You'll control the bass from your amplifier.
6. Tucking It Back In: Stereo Replacement
Carefully slide the factory stereo back into its opening, ensuring no wires are pinched. Reinstall the mounting screws and snap the trim panels back into place. Double-check that all clips are secure and flush.
7. Grounding Your Amplifier
A solid ground connection is crucial for performance and safety.
- Prepare the Ground Point: Remember that bare metal spot you found earlier? Sand off any paint to expose clean, shiny metal. This provides the best electrical conductivity.
- Connect the Ground Wire: Connect one end of your ground wire to the negative terminal of your amplifier (or powered subwoofer).
- Secure to Chassis: Tightly secure the other end of the ground wire to your prepared ground point using a self-tapping screw or a factory bolt. Ensure it's wrench-tight – a loose ground is a common cause of system issues.
8. Final Amplifier Connections
You're almost there! Connect the remaining wires to your amplifier.
- Power: Connect the power wire (the one from the inline fuse) to the positive (+) 12V terminal on your amplifier.
- Ground: Connect the ground wire to the negative (-) or GND terminal.
- Remote: Connect the remote turn-on wire to the REM terminal.
- RCAs: Plug your RCA cables into the corresponding input jacks on the amplifier, typically labeled "INPUT" or "LINE IN."
9. Hooking Up the Subwoofer
This is usually the simplest connection.
- Place the Sub: Position your subwoofer enclosure in its final location.
- Speaker Wires: Using your speaker wires, connect the subwoofer to the amplifier. Pay close attention to positive (+) and negative (-) terminals on both the amp and the subwoofer. Mismatched polarity will result in weak, "out of phase" bass. If your subwoofer has multiple voice coils or terminals, consult its manual for correct wiring (series or parallel) to achieve the desired impedance for your amplifier.
10. The Moment of Truth: Final Check & Test
Before reconnecting the battery, take a moment for a thorough visual inspection.
- Double-Check All Connections: Ensure every wire is securely connected, not frayed, and properly insulated. Verify polarity (positive to positive, negative to negative) for the subwoofer.
- Insert the Fuse: Now, and only now, insert the fuse into the inline fuse holder near the battery.
- Reconnect Battery: Reconnect the negative terminal cable to your car battery.
- Power Up & Test: Start your Xterra, turn on the factory stereo, and play some music with strong bass content. Start with the head unit volume low. Your amplifier should power on (you might see an indicator light). If you hear bass, congratulations!
The Art of Tuning: Making Your Bass Sound Right
Getting sound is one thing; making it sound good is another. Proper tuning transforms thumpy, muddy bass into tight, impactful low-end.
1. Setting the Amplifier Gain: Your Volume Control
Think of gain as matching the amplifier's input sensitivity to your stereo's output, not as a volume knob.
- Head Unit Volume: Turn your Xterra's factory stereo volume up to about 75% of its maximum. This is typically the loudest undistorted level the stereo can produce.
- Slowly Increase Gain: With music playing, slowly turn up the gain knob on your amplifier. Listen carefully for distortion or a "strained" sound from the subwoofer.
- Find the Sweet Spot: As soon as you hear any distortion, back off the gain slightly. The goal is tight, controlled bass, not ear-splitting boominess. You want the subwoofer to complement, not overpower, your factory speakers.
2. Crossover Adjustment: Blending the Frequencies
The low-pass filter (LPF) tells your subwoofer what frequencies to play and what to leave to your main speakers.
- Starting Point: A good starting point for most subwoofers in an Xterra is around 80 Hz with a 24 dB/octave slope. This means frequencies above 80 Hz are sharply cut off from the subwoofer.
- Fine-Tuning:
- Smoother Blend: For a more seamless blend, especially if your factory speakers have limited bass response, you might try a slightly higher setting, like 100 Hz, with a shallower 12 dB/octave slope.
- Tightening Bass: If the bass sounds "boomy" or muddy, try lowering the crossover frequency by 10-20 Hz.
- Listen and Adjust: Play various types of music. The goal is for the bass to sound like it's coming from the front of the vehicle, blending perfectly with your main speakers, rather than sounding distinctly from the cargo area.
3. Equalization (EQ) and Phase (Optional, but Recommended for Perfection)
Advanced tuning can dramatically improve integration.
- Phase Switch: Most amps have a 0/180-degree phase switch. Flip between the two settings while listening to music. Choose the setting that results in the loudest, most impactful bass from your listening position. This corrects for timing differences between the subwoofer and main speakers.
- Built-in EQ: Some amplifiers or LOCs offer basic EQ controls (like a bass boost knob). Use these sparingly, if at all. A gentle 2-3 dB boost at a "room null" frequency (e.g., in the 60-120 Hz range) with a narrow Q (around 0.7) can help compensate for the Xterra's cabin acoustics, but excessive boosting causes distortion.
- External DSP: For truly professional-level tuning, an external Digital Sound Processor (DSP) can perform precise equalization and time alignment, but this is a more advanced (and costly) upgrade.
4. The Listening Test: Trust Your Ears
Walk around your Xterra's cabin while music is playing. Sit in different seats. Notice if there are "dead spots" where bass disappears or "boomy spots" where it's overwhelming. Play a sine-wave sweep (40-120 Hz) to get a sense of your system's frequency response within the vehicle. This helps identify cabin resonances that you might try to mitigate with EQ.
Troubleshooting Common Issues: Quick Fixes for Frustration
Even the most careful installations can encounter a hiccup or two. Here's a rundown of common problems and how to tackle them.
- No Sound from the Subwoofer:
- Check Fuses: Is the inline fuse near the battery blown? Is the fuse on the amplifier itself intact?
- Remote Turn-On: Is the remote turn-on wire securely connected to an ignition-switched 12V source? Use a multimeter to check for 12V when the car is on. If the amp isn't turning on, this is the first suspect.
- RCA Cables: Are they securely plugged in at both ends (stereo/LOC and amp)? Are they damaged?
- Ground Wire: Is the ground wire loose or poorly connected? Is there bare metal contact?
- Gain Setting: Is the gain knob turned all the way down?
- Speaker Wires: Are the subwoofer's speaker wires connected correctly and securely to the amp?
- Buzzing or Hissing Sound (Even with Music Off):
- Ground Loop: This is often a ground loop issue. Ensure your ground wire is short, thick, and connected to bare metal.
- Wire Routing: Did you route the power wire and signal wires on opposite sides? If not, reroute them.
- RCA Interference: Try adding ferrite beads to the RCA leads, or consider higher quality, shielded RCA cables.
- LOC Quality: A low-quality LOC can introduce noise.
- Boomy or Muddy Bass:
- Crossover Too High: Lower the low-pass filter frequency (e.g., from 100 Hz to 80 Hz or 60 Hz) and potentially use a steeper slope (24 dB/octave).
- Gain Too High: Reduce the amplifier's gain setting.
- Enclosure Issues: For sealed boxes, adding acoustic damping material (like poly-fill) can sometimes tighten the bass. For ported boxes, ensure the port tuning is appropriate for your subwoofer.
- Intermittent Cut-Outs:
- Loose Connections: Inspect all crimped connections or soldered joints for "cold" splices. Re-crimp or re-solder as needed.
- Overheating: Is the amplifier getting too hot? Ensure it has adequate ventilation. The amp might be going into protection mode.
- Impedance Mismatch: Is your subwoofer wired to the correct impedance for your amplifier?
- Power Wire Gauge: Is your power wire thick enough for your amplifier's power demands?
If you've exhausted these troubleshooting steps and still face persistent issues, don't hesitate to consult a professional car audio installer. They have specialized tools and expertise for diagnosing complex problems.
Unleash the Bass: Your Xterra's Audio Transformation Awaits
Integrating subwoofers with Xterra factory audio systems is more than just an upgrade; it’s an transformation of your driving experience. By following these steps and prioritizing safety, you'll unlock a new dimension of sound that makes every song, podcast, and adventure more engaging. So, grab your tools, put on your favorite playlist, and get ready to feel the music like never before in your Xterra.