When the rumble of your Xterra’s engine is perfectly complemented by the deep, resonant thump of a well-tuned subwoofer, that's driving nirvana. But what happens when the bass vanishes, or worse, sounds muddy and distorted? Whether you're chasing that elusive perfect sound or battling a sudden silence, mastering the art of troubleshooting and optimizing your Xterra's subwoofer performance can transform your daily commute into an immersive audio experience.
This isn't just about turning up the volume; it’s about understanding the synergy between your subwoofer, your Xterra’s unique cabin acoustics, and your head unit settings. It’s about coaxing out clean, powerful lows that enhance every track without overpowering it.
At a Glance: Your Xterra Subwoofer Survival Guide
- Check the Basics First: Before diving deep, confirm all cables are secure, power is flowing, and volume knobs aren't set to zero.
- Head Unit is Key: Your car stereo (head unit) settings — especially crossover and subwoofer level — are critical for proper bass output.
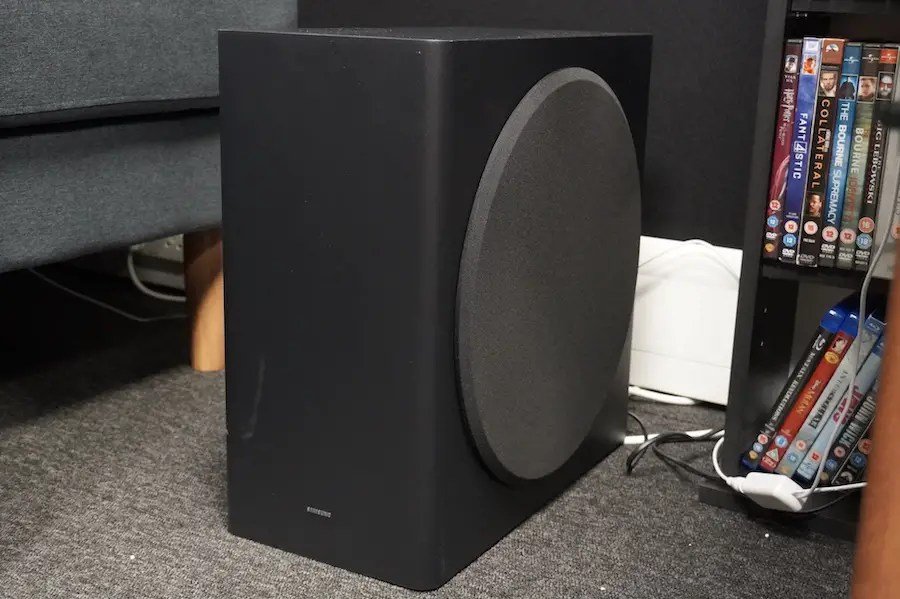
- Placement Matters: Even in a vehicle, strategic placement in the cargo area or under seats can dramatically alter bass impact and clarity.
- Calibrate for Clarity: Fine-tuning your subwoofer's phase, crossover, and gain settings prevents distortion and blends the bass seamlessly with your other speakers.
- Acoustics are Real: Your Xterra's cabin has its own sound properties; sound deadening and absorption can make a big difference.
- Listen for Clues: Burning smells or strange noises often indicate a more serious, irreparable internal component failure.
- Regular Maintenance: Keep your subwoofer clean and cool to extend its life and performance.
The Silent Bass: Troubleshooting Common Xterra Subwoofer Issues
Nothing’s more frustrating than expecting a satisfying bass line and getting… nothing. Or maybe a weak, barely-there thud. Before you despair or call a professional, let’s systematically diagnose why your Xterra’s subwoofer might be underperforming or completely silent.
1. The Cable Caper: Inspecting Connections & Wires
Often, the simplest explanation is the right one.
- RCA & Power Cord Check: Carefully inspect the RCA cable (connecting your head unit to the subwoofer amplifier) and the power cord. Look for any visible damage like kinks, bends, or frayed wires. Are the connectors themselves bent or corroded? Even a tiny break can disrupt the signal.
- Secure Connections: Ensure the RCA cable is fully seated in both the head unit's subwoofer output (or amp input) and the subwoofer's input. Wiggle them gently to confirm they aren't loose. In a vibrating vehicle, connections can loosen over time. If you suspect old or worn cables, replacing them is a cheap and effective first step.
2. Head Unit Hiccups: Decoding Your Stereo Settings
Your Xterra's head unit (car stereo) is the brain of your audio system, and its settings can easily mute your subwoofer.
- Subwoofer Channel Enabled: Dig into your head unit's audio settings menu. Many aftermarket units have an option to enable or disable the subwoofer output. Make sure it's turned "on."
- Dynamic Range Control (DRC): If your head unit has a "Dynamic Range Control" or "Loudness" feature, try disabling it. While intended to compress audio for consistent volume, it can dramatically reduce perceived bass output.
- "Direct" or "Stereo" Mode: Some advanced head units offer specific audio modes. If yours is set to "Direct" or "Stereo," it might be bypassing the subwoofer output, sending all frequencies to the main speakers. Switch to a "Surround" or "All Channel Stereo" mode if available, or simply a mode that explicitly uses the subwoofer.
- Crossover Catastrophe: Check your crossover settings. If the high-pass filter for your subwoofer is set too high, or the low-pass filter for your main speakers is set too low, you might have a gap where your subwoofer isn't playing its designated low-frequency range. A common starting point for a subwoofer crossover is around 80 Hz, but experiment slightly above or below.
- Subwoofer Volume: This might seem obvious, but confirm the subwoofer's output level isn't set to zero or extremely low in your head unit's settings. Also, ensure the physical power switch on the subwoofer itself (if it's an active sub with a built-in amp) or on its amplifier is "on."
3. Power Predicament: Is It Getting Electricity?
A subwoofer without power is just a box.
- Test the Outlet (Vehicle Context): In a car, this means checking the fuse. Locate your Xterra's fuse box (often under the dash or hood) and check the fuse dedicated to your aftermarket amplifier or active subwoofer. A blown fuse means no power. Replace it with one of the exact same amperage. If it blows again immediately, you have a short circuit that needs professional diagnosis.
- Ground Connection: A loose or corroded ground wire for your amplifier or active subwoofer can prevent it from powering on or performing correctly. Ensure the ground wire is securely fastened to a clean, unpainted metal surface on your Xterra's chassis.
4. Phase Fiasco: Getting Everything in Sync
Phase refers to whether your subwoofer's sound waves are moving in sync with your other speakers. If they're out of phase, sound waves can cancel each other out, leading to weak or muddy bass.
- Phase Setting: Look for a "phase" switch or setting on your subwoofer or amplifier. It usually has options for 0 degrees or 180 degrees. If your subwoofer and speakers were previously working in harmony, try flipping this switch. Often, leaving it at 0 or "off" (depending on labeling) is the correct setting unless you're manually time-aligning your speakers. Experiment to see which setting yields the most impactful and coherent bass.
5. Firmware Flukes: Post-Update Anomalies
If you recently updated your aftermarket head unit's firmware, new default settings might have been applied. Check all your audio settings, especially those related to subwoofer output and crossovers, and readjust them to your preferences.
6. The Subwoofer's Own Volume Knob: A Simple Overlook
Many active subwoofers and standalone amplifiers have a "level" or "gain" knob directly on the unit.
- Increase the Level: If your head unit's subwoofer output is up but the bass is still weak, check this knob on the subwoofer or amplifier. Start by setting it to about the 1 o'clock position and fine-tune from there, balancing it with your head unit's subwoofer level.
7. Internal Amplifier Ailments: When the Brain Fails
If your active subwoofer's power LED light is off despite being switched on and receiving power, or if it's unresponsive, the internal amplifier might have failed.
- Signs of Failure: This often happens in older units or after periods of overuse. You might hear a pop or crackle before it goes silent.
- Solution: An internal amplifier failure typically requires professional repair or, more commonly, replacement of the entire active subwoofer.
8. The Dreaded Voice Coil: A Terminal Diagnosis
This is a serious one.
- Signs: A distinct burning smell emanating from the subwoofer, or a "crunchy" or scratchy feeling when you gently press down on the cone (speaker part) with your fingers.
- Cause: This occurs when the subwoofer is played too loudly for too long, overheating the voice coil.
- Solution: An overheated and failed voice coil is generally unfixable and means the subwoofer itself needs to be replaced. For reliable options that fit your Xterra, consider exploring Subwoofers for 2nd Gen Xterra designed to handle the rigors of vehicle use.
9. Null Spot Nonsense: Where Sound Waves Cancel
If you've just installed a new subwoofer and there's little to no sound, even when everything else seems correct, it might be sitting in an acoustic "null" spot in your Xterra's cabin.
- The "Subwoofer Crawl" (Vehicle Edition): While you can't literally crawl around your Xterra, you can experiment. Place the subwoofer in different positions within your cargo area or under seats. Play a bass-heavy track and listen from your typical driving position. Move it closer to the rear hatch, then further in, then to one side, etc. The location where the bass sounds the strongest, clearest, and most integrated is your sweet spot.
Wireless Woes: Tackling Interference
If you're using a wireless subwoofer setup (less common in direct car audio, but relevant for some home-integrated portable systems or unique vehicle builds):
- Interference Check: Ensure the wireless receiver/transmitter isn't too close to other electronic devices in your Xterra (e.g., cell phones, chargers, navigation units) that could be causing signal interference. This can lead to distortion, dropouts, or simply weak bass. Try relocating the transmitter or receiver a few inches away.
Unleashing the Lows: Optimizing Your Xterra's Subwoofer Performance
Now that we’ve tackled the troubleshooting, let's talk about taking your Xterra’s bass from good to truly great. Optimization is about precision, balance, and tuning your system to your vehicle's unique environment.
1. Strategic Placement in Your Xterra's Cabin
Unlike a living room, your Xterra's interior is a confined, reflective space. Subwoofer placement is still crucial.
- The Cargo Area Sweet Spot: For most Xterras, the cargo area is the primary location for a subwoofer enclosure. Experiment with placing it against the rear seats, closer to the hatch, or in one of the rear corners. Corners often provide acoustic loading, making the bass sound louder and deeper.
- Aim for Evenness: The goal isn't just loud bass, but even bass throughout the cabin. Listen from the driver's seat and then from the passenger seat.
- Enclosure Type: The subwoofer's enclosure design (sealed or ported) also impacts how it sounds in different placements. Sealed enclosures tend to be tighter and more accurate, while ported enclosures can be louder and extend deeper. If you're considering different options, research into subwoofers for SUVs can guide your choice.
2. The Art of Calibration: Fine-Tuning Your Frequencies
Calibration is where your subwoofer really starts to sing in harmony with your Xterra's other speakers.
- Gain (Level) Setting: This sets the input sensitivity for your amplifier. Start with the gain knob on your amp or active subwoofer turned all the way down. Play a test tone or music at a comfortable listening level. Slowly increase the gain until you hear distortion, then back it off slightly. The goal is to match the subwoofer's output to your head unit's output without clipping.
- Crossover Frequency: This determines which frequencies go to your subwoofer and which go to your main speakers.
- Subwoofer (Low-Pass Filter - LPF): Set this so your subwoofer only plays the lowest frequencies. A common starting point is 80 Hz, but depending on your main speakers' capabilities, you might go slightly lower (60 Hz) or higher (100 Hz).
- Main Speakers (High-Pass Filter - HPF): If your head unit or external amplifier has an HPF for your main speakers, set it to the same frequency as your subwoofer's LPF. This prevents your main speakers from trying to reproduce bass frequencies they can't handle, leading to distortion and muddy sound. This seamless transition is key to a balanced system. For more advanced setups, understanding what a subwoofer crossover setting does can help you dial it in perfectly.
- Phase Adjustment: As discussed, setting phase to 0 or 180 degrees can significantly impact bass clarity and impact. Listen carefully to a bass-heavy track with both settings and choose the one that provides the most coherent and impactful bass from your listening position.
- Time Alignment (Advanced): Some higher-end head units or digital signal processors (DSPs) allow for time alignment. This delays the sound from speakers closest to you so that all sound waves arrive at your ears at the same time, creating a more cohesive soundstage. This is often done by measuring the distance from each speaker to your head.
3. Integrated Performance: Speakers & Subwoofer in Harmony
Your Xterra’s audio system is just that – a system. For truly enhanced bass, all components need to work together.
- Frequency Response Match: Ideally, your subwoofer should take over seamlessly where your main speakers roll off. If your main speakers struggle with frequencies below 100 Hz, your subwoofer should be set to pick up from that point.
- Output Levels: Don't let your subwoofer overpower your other speakers. Adjust its gain and your head unit's subwoofer level to blend the bass naturally. It should be felt and heard, but not solely heard. The bass should enhance the music, not become the only thing you hear.
4. Head Unit Settings: Beyond the Basics
Your Xterra's stereo offers more than just volume and bass/treble.
- EQ Settings: Use your head unit's equalizer (EQ) to fine-tune the overall sound. You might have presets (Rock, Pop, etc.) or a custom EQ. Be judicious with bass boost; too much can introduce distortion.
- Bass Boost: Many head units have a dedicated bass boost feature. Use it sparingly, if at all, after you've properly set your gain and crossovers. Too much bass boost can quickly lead to an overdriven, boomy, and distorted sound.
5. Cabin Acoustics: Taming the Xterra's Echo Chamber
Your Xterra's interior, with its hard surfaces like glass, plastic, and metal, can create reflections and echoes that degrade sound quality.
- Sound Deadening: Applying sound deadening material to your Xterra’s doors, floor, and cargo area can significantly reduce road noise and prevent panel vibrations, allowing your subwoofer's bass to sound tighter and more impactful.
- Bass Traps (Car Edition): While not traditional bass traps, adding soft furnishings like thick floor mats, seat covers, or even custom carpeting in the cargo area can help absorb some reflections and prevent booming.
- Room Correction Software (RTA): For serious audiophiles, a Real-Time Analyzer (RTA) app on a smartphone (with a calibration mic) or a dedicated car audio DSP can measure your Xterra's in-cabin frequency response and help you precisely tune your EQ to counteract acoustic anomalies.
6. Subwoofer Longevity: Maintenance for Lasting Bass
Proper care extends the life and maintains the performance of your subwoofer.
- Cleanliness: Regularly clean the subwoofer's cone and port (if ported) to remove dust, dirt, and debris. A soft brush or a light vacuum attachment can do the trick.
- Ventilation: Ensure your amplifier and the subwoofer itself have proper ventilation. Don't block air vents or place the subwoofer in a cramped space where heat can build up. Overheating is a common cause of amplifier and voice coil failure.
- Avoid Extreme Volumes: While tempting, continuously playing your subwoofer at maximum volume can lead to overheating and premature failure, particularly of the voice coil. Listen responsibly.
Your Xterra, Your Sound: The Path to Bass Perfection
Achieving truly satisfying bass in your Xterra is a journey of careful setup, patient tuning, and thoughtful maintenance. It's about finding the sweet spot where your subwoofer enhances your music, adding depth and impact without overwhelming the soundstage. By systematically troubleshooting issues and meticulously optimizing your settings, you're not just fixing a problem; you're unlocking your Xterra's full audio potential.
Remember, every Xterra cabin is slightly different, and your personal preference matters most. Don't be afraid to experiment with settings, listen critically, and make incremental adjustments. The perfect bass response is within your reach, transforming every drive into a concert-like experience.